by Jennifer Griffin | Aug 6, 2014
Most of the time I’m blogging about decorating and DIY projects, but as a parent when I come across something I think you might like too, I love to share it! And, as a believer there is no higher calling than raising your children to love Jesus, be obedient to Him, and want to serve Him with their lives. As my children are growing, we’re beginning to experience some vital milestones in their development.
 Fifth grade is a big year in our school system. It’s the last year of Elementary School, and the year when students participate in their first “Growth and Development” class. Our school system does a very good job in the presentation of the materials, but we definitely don’t want that to be the first time that our kids are exposed to those topics. So, ready or not, near the end of 5th grade has been the time for us to have “the talk” with our kids.
I’m not going to go into a lot of details, but I did want to share a resource that was very helpful to us. It’s a Christian-based cd/workbook program called Passport to Purity by Dennis and Barbara Rainey. It focuses on God’s plan for their lives as they strive to keep Him first and is designed to help parents in discussing love, sex, and relationships with their child as they enter adolescence. The sessions start gently with subjects such as not “running with the herd” and addressing friends and peer pressure. I also really like that there are separate CDs specifically for boys and girls for the sex session, so those focus specifically on things that need to be addressed for each gender.
One thing that the materials encourage is taking time for a special getaway with your child. We chose a destination about three hours away…just enough time in the car with your captive audience for some open and honest discussion time.
This program includes multiple sessions, but this time we only did a few of the sessions that covered just the basics. As our children get closer to moving into dating we will continue the rest of the sessions then. Also, you can sort-of customize this plan into how you want to use it. We strictly used the cds as a starting point for our discussion, listening while our child filled in blanks in their listening guide, and stopping the cd for further discussions when needed. There are also suggested projects and activities that correlate with each session, but we didn’t use those. As parents we listened to all of the material before hand and were prepared to pick and choose what we wanted to focus on.
My husband took our son two years ago, and recently, it was my turn (EEK!). Our girls’ getaway was tailored to doing some of my daughter’s favorite things…she’s not a shopper, although we did spend a little time choosing some new Spring outfits. We also chose a few of her favorite restaurants and treats, spent time playing mini-golf and arcade games, and enjoyed lounging at a hotel.
At the end of our getaway she received a special necklace as a memento of our weekend, and reminder of how much we love her and want her to know God’s best plan for her life.
Here’s a post that I came across as I was writing this one. It has more information about Passport to Purity and some great tips if you think this material might be for you. What a valuable time to spend together and wise investment in the lives of our children. My prayer is that by making the effort with these kinds of discussions, our children will always feel comfortable talking with us about whatever tough issues arise as they’re growing up, and that the Lord grants us wisdom in dealing with their each and every concern as their little hearts are molded to be more like His.
“How blessed are those whose way is blameless,
Who walk in the law of the Lord.”
Psalm 119:1 (NASB)
by Jennifer Griffin | Nov 22, 2013
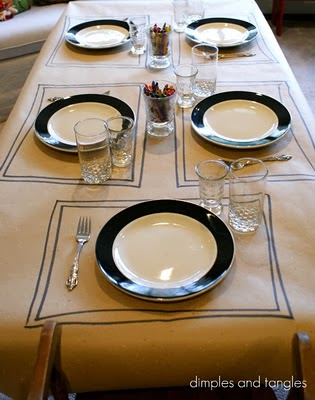
Thanksgiving is just a few days away! Are you hosting guests in your home? If so, here are a few simple tips to create a beautiful table.
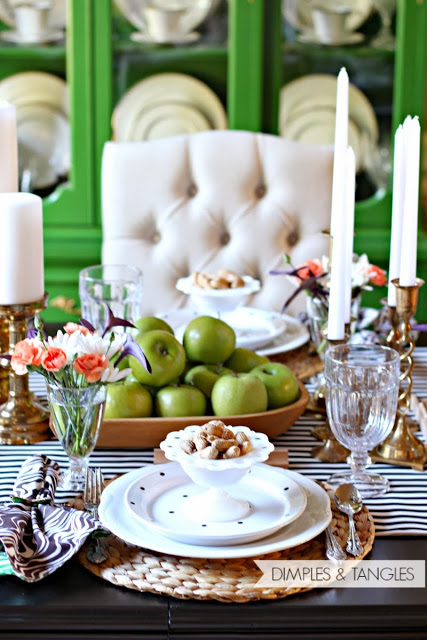
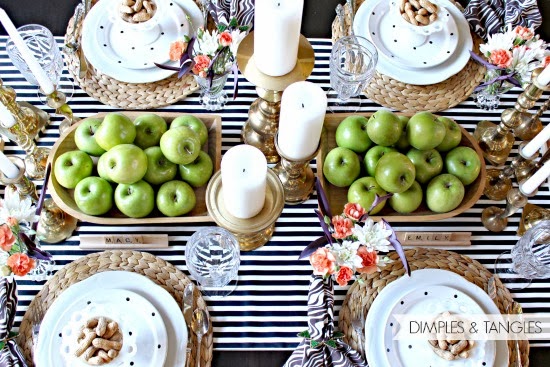
1) It may be helpful to choose a color scheme, and then gather up things around your house that fit. Color inspiration could start with a special set of dishes, flowers, a centerpiece, fun napkins, or whatever inspires you.
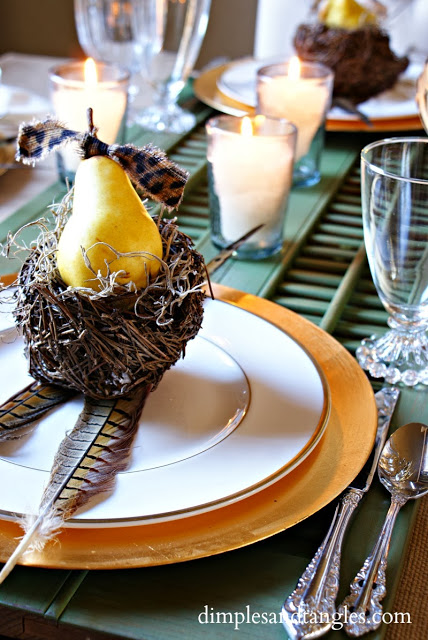
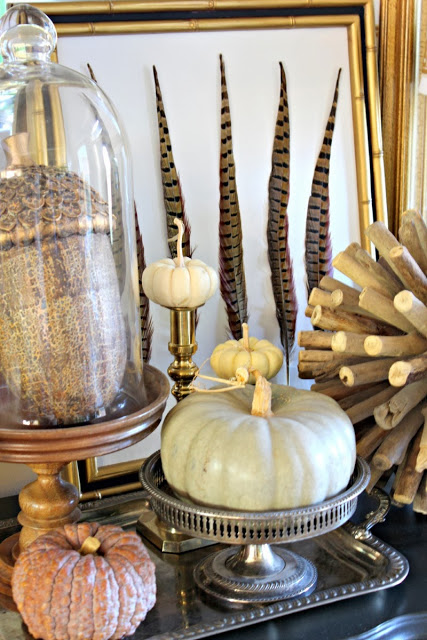
This table started with black and white, gold, and lime green, and then I added some color in with the flowers.
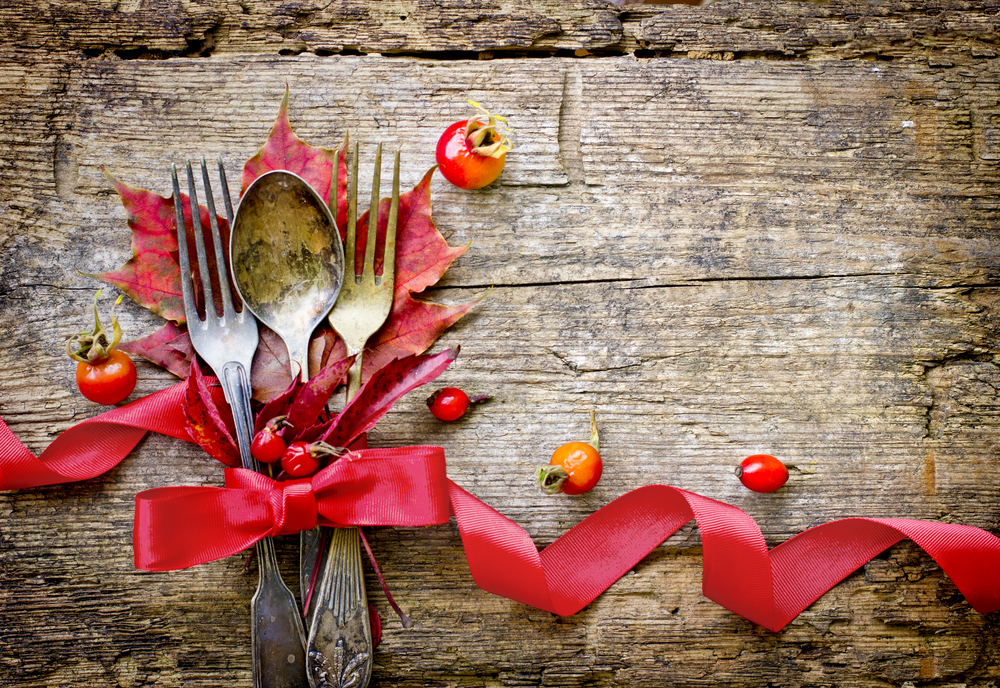
Thanksgiving is easy, when your colors could come from nature itself, where there are lots of warm, neutral, natural colors. Even at that, I still find myself adding in a pop of color here and there among the neutrals.
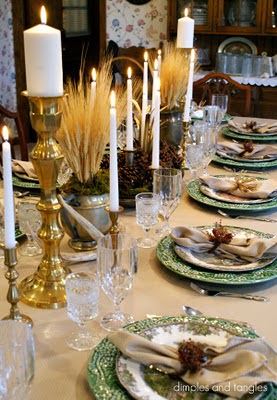
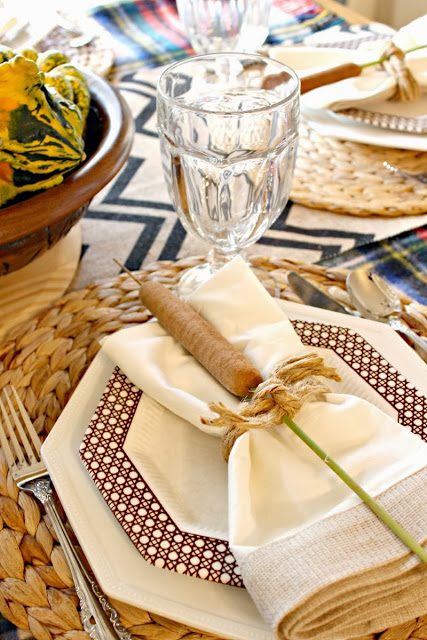
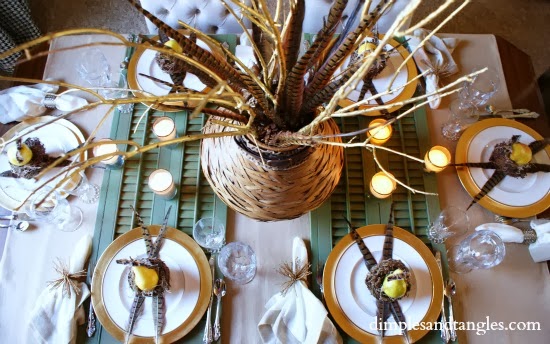
2) Layer it up! Try to mix in different textures, and “build up” what’s on your table. Start with a tablecloth, runner, or placemats, and then add a charger if you like, dinner plate, and salad plate or bowl in the center. For your centerpiece, objects with varying heights are always appealing. Just remember, if you place something tall in the middle, make sure it’s easy to remove once the meal starts so your guests can see each other!
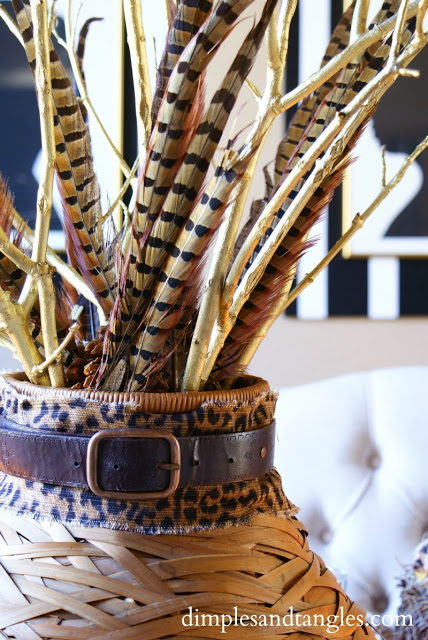
3) Don’t be afraid to use unconventional items. Here are a few of my favorite things to include:
Shutters-A great way to add texture and interest to the table.
A Blanket-Works in a pinch as a table cloth or runner.
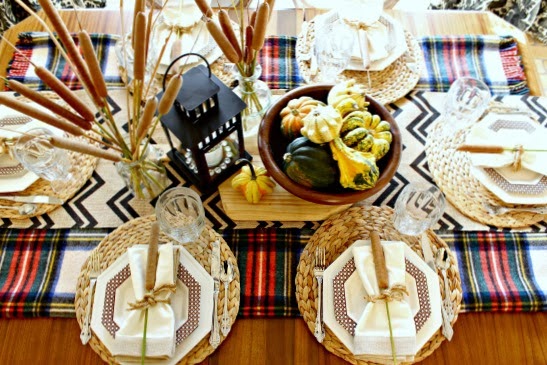
Fabric-Many, many times I have used a piece of fabric with the edges just folded under as a table runner.
Belt-Think about objects you can use in a different way than their original purpose.
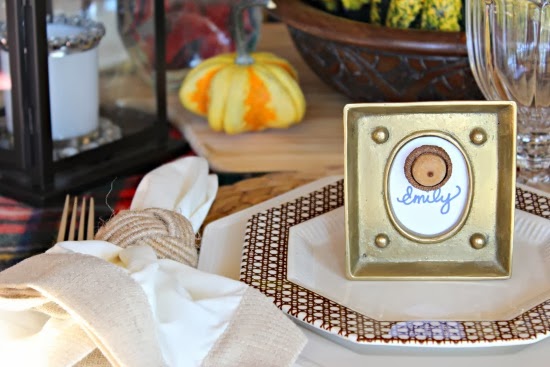
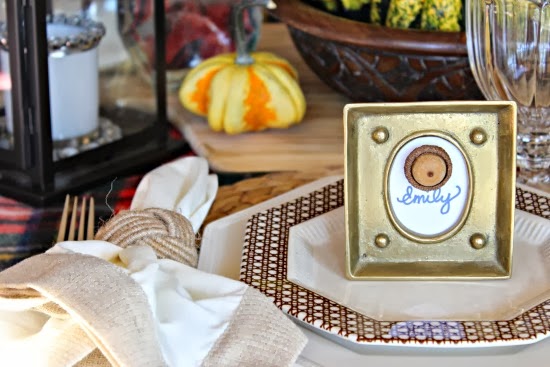
4) Include a little something personal to make your guests feel special.
Most often this can be accomplished with something as simple as a place card, but a small treat or favor at their seat works well also.

5) Don’t forget the kids!
If there will be a separate table for children, why not include some things to keep them entertained while they are eating? With nothing more than some butcher paper (or the back side of a roll of wrapping paper) and crayons you’re all set!
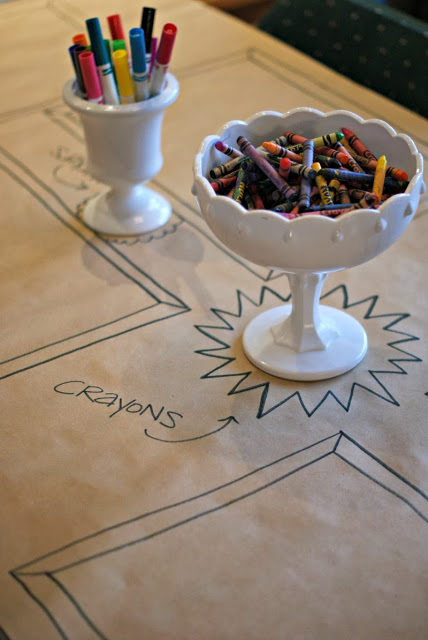
And to simplify things even more, draw their place settings in place! They can color their placemat and decorate their area surrounding it. Or, suggest that they draw/list the top 5 things that they are thankful for.
Now, a word. Your table doesn’t need to be picture perfect! Have fun with it. The most important thing is that you welcome your guests with grace and shower them with hospitality while they are in your home. After they leave, no one will remember your perfectly-set table, but they will remember the special memories made with those in your home that day.
“It is good to give thanks to the Lord and to sing praises to Your name, O Most High; to declare Your lovingkindness in the morning and Your faithfulness by night.” — Psalm 92:1-2
Blessings to you this Thanksgiving!
by Jennifer Griffin | Oct 25, 2013
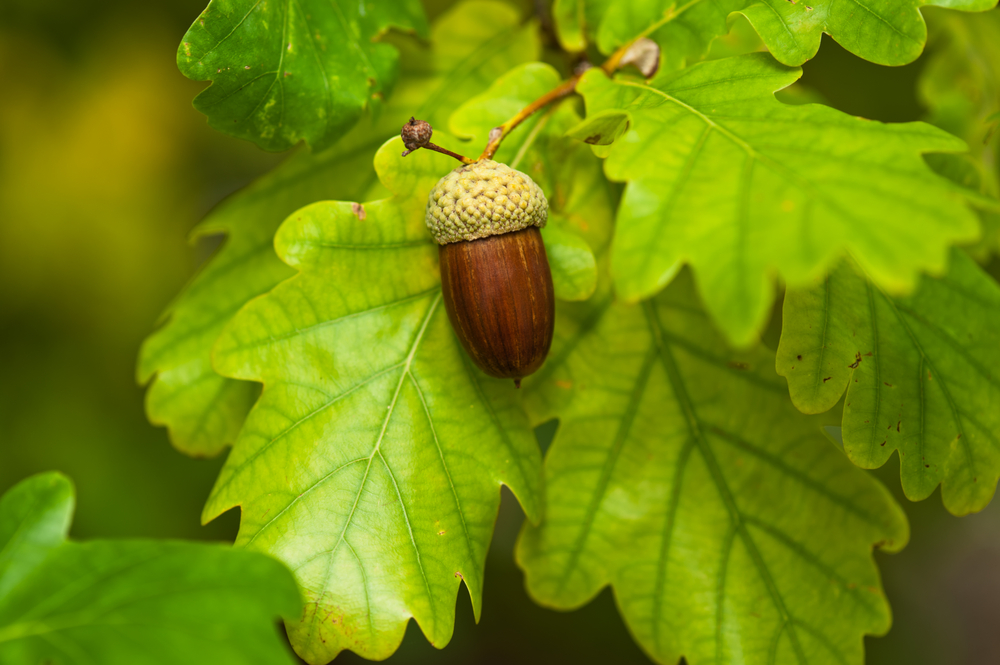
Are you ready for a project that will take you right back to Kindergarten Sunday School? Go on a nature walk (take your kids if you have some!), pick up a few things that are interesting to you, and let’s get started! You’ll also need a frame, some mat board, and a hot glue gun.
If your frame is open, use a straight edge ruler and an exacto knife to cut a piece of mat board to fit. Mat board can be found at craft stores with a framing department, such as Hobby Lobby, and comes in a variety of colors. A huge sheet will cost around $7, large enough to make multiple pieces. If your frame has a backing and glass, open the back, remove the glass, and cut your mat board to fit.
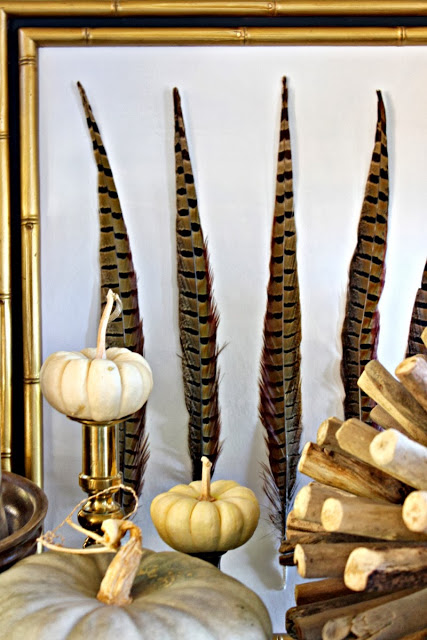
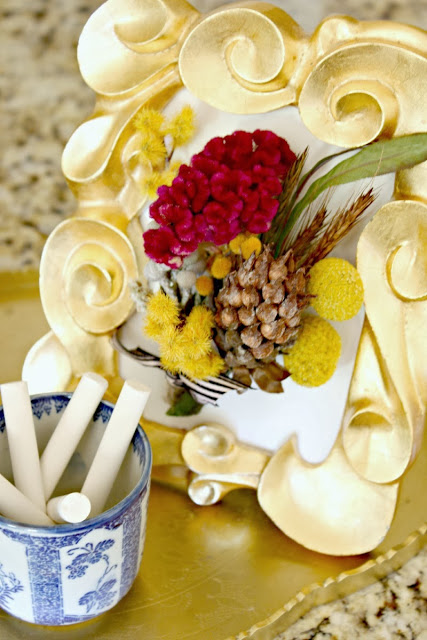
Choose what items you would like to use for your artwork. During this time of year, the selection is plentiful! Acorns, nuts, feathers, dried flowers, colorful leaves, small collected rocks, twigs…the sky is the limit! Play around with some arrangements of your items until the look pleases you, and then use a small amount of hot glue to attach each one to the mat board.
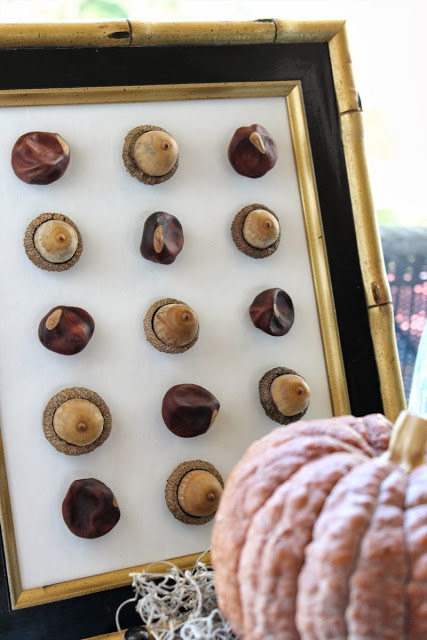
Finally, pop your decorated mat board back in the frame. If it had a backing, just re-attach it. If you had an open frame, a tiny dot of hot glue in each corner on the back will secure your picture in the frame. When you’re ready to re-use it, the glue should easily pop off.
My sister recently got married, and my husband officiated the wedding, so I saved his boutonniere and some flowers that were in my daughter’s hair and made them into a mini-framed bouquet for a special memory of the evening.
Your new artwork can be hung on the wall, leaned on the top of a dresser or your mantle, or propped on a small easel and displayed on an end or side table. I’m planning to pick up some small frames and make some of these to use as place cards on my Thanksgiving table.
This is a project that’s fun for the whole family! I love these little reminders of God’s amazing creation spread throughout our home. He truly is the Master Artist!
“You are worthy, O Lord, to receive glory and honor and power;
For you created all things, and by Your will they exist and were created.”
Revelation 4:11 (NIV)
by Jennifer Griffin | Aug 29, 2013
Often when I feel that I need a little change in my decor, it’s as simple as making a quick trip to the grocery store. Many grocery stores now have floral departments with very reasonable fresh flowers. Nothing can brighten your space, or your mood, faster!
Homeland is my favorite local store for purchasing flowers. They always have a good selection of $4 bunches of flowers. One is enough, but even if you want to buy a few bunches the cost is still reasonable.
Here are a few ways I’ve used grocery store flowers to decorate.
This was a bunch of tulips that lasted for a week or two, completely worth the small price for the beauty they added to my kitchen. Did you know that if you put a penny in the water it will keep the tulips from drooping?
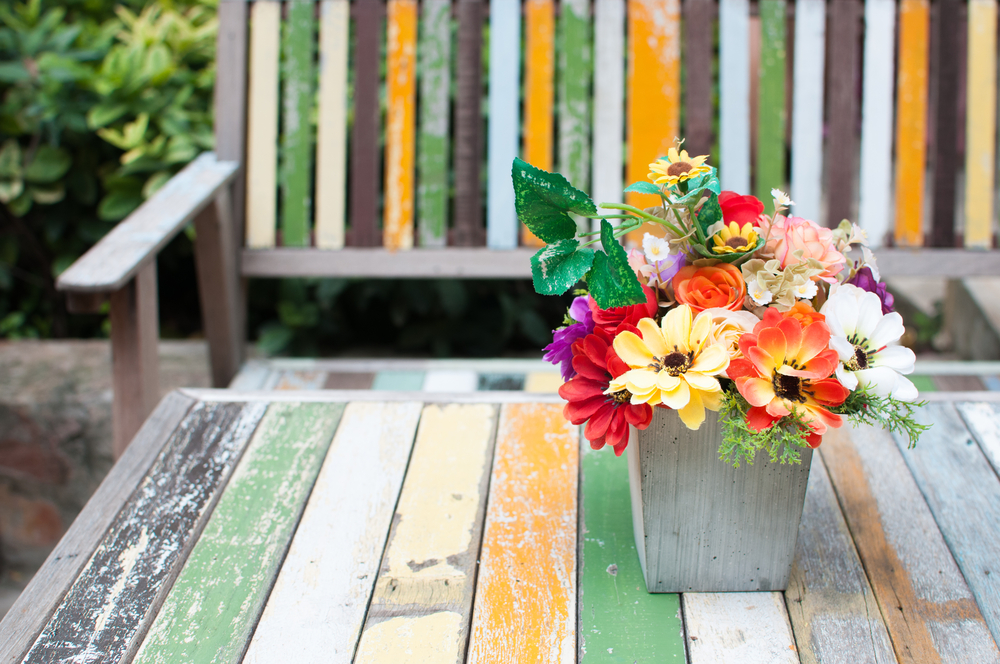
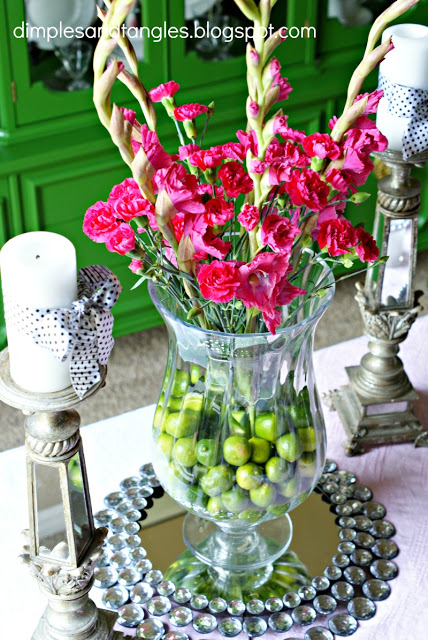
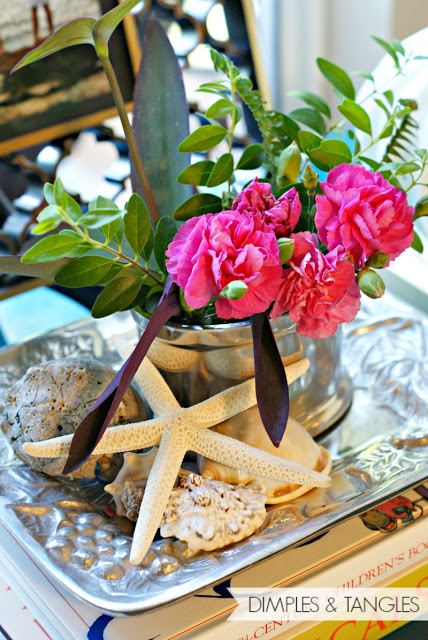
At a recent baby shower I bought a bunch of gladiolas and a bunch of mini-carnations, along with a bag of key limes for this table arrangement. The secret to this type of arrangement is to put the flowers in a narrow cylinder-shaped vase that slips down in to the middle of a wider, rounder vase, and then pour the limes in the space between.
Certain types of flowers will last up to a month if you trim the stems a bit and change the water every few days. I’ve found mini-carnations to have the longest life of any flowers I’ve tried. When the glads from the shower died, I picked up another bunch of mini-carnations and mixed it with the pink ones and the limes that I already had to create another set of arrangements that lasted several more weeks.
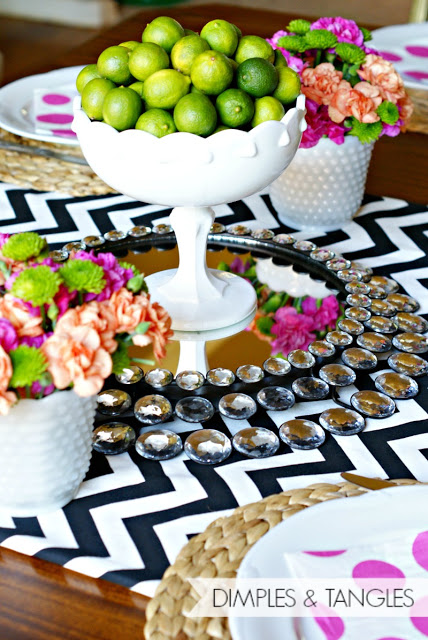
Thrift stores and garage sales are my favorite source for great containers and vases. With the easy switch-up, I was all ready to entertain some college friends for lunch with a colorful yet simple table.
I also like to pull a few stems out of the bunch and spread them around as much as possible in the room.
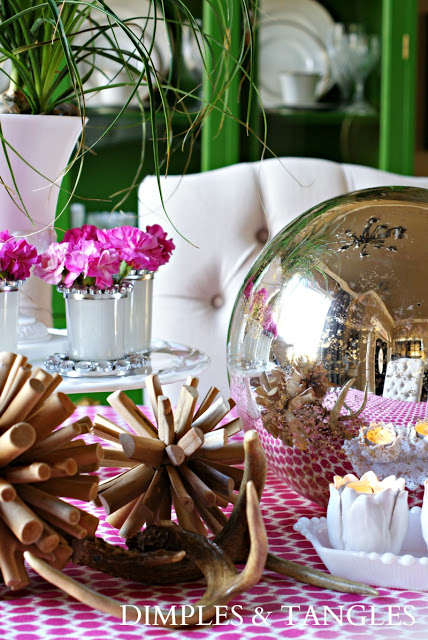
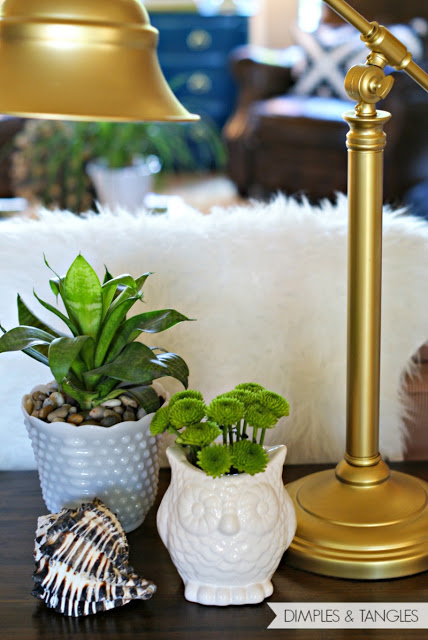
To make that bouquet or two stretch even further, mix in a few greenery clippings from your yard or potted plants.

I’m so thankful for the variety of God’s bright, beautiful creation, and the creativity that it inspires in us!
Then God said, “Let the earth produce vegetation: seed-bearing plants and fruit trees on the earth bearing fruit with seed in it according to their kinds.” And it was so. The earth produced vegetation: seed-bearing plants according to their kinds and trees bearing fruit with seed in it according to their kinds. And God saw that it was good. Evening came and then morning: the third day. Genesis 1:11-13 (HCSB)

by Jennifer Griffin | Jul 12, 2013
If I was a real designer and had a bag of tricks, this one would be at the top of my list! I’m such a visual person, yet indecisive at times, that when I have an idea I really like to see what it might look like for real in my space.
So, enter….photo editing! With a photo of the space I’m working with, I turn to this tool over and over again.
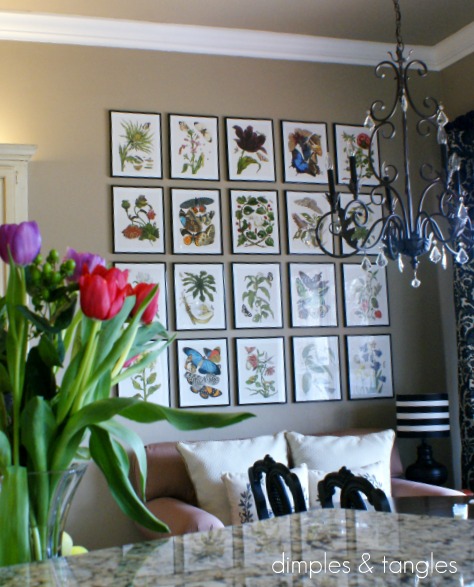
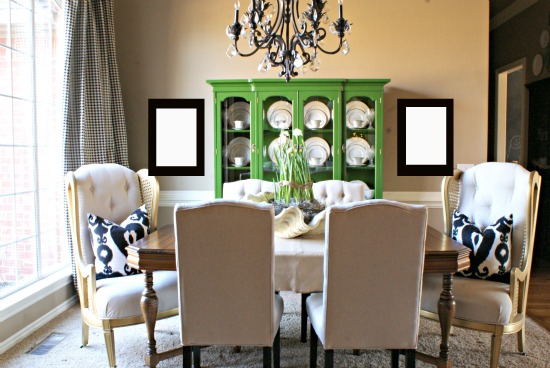
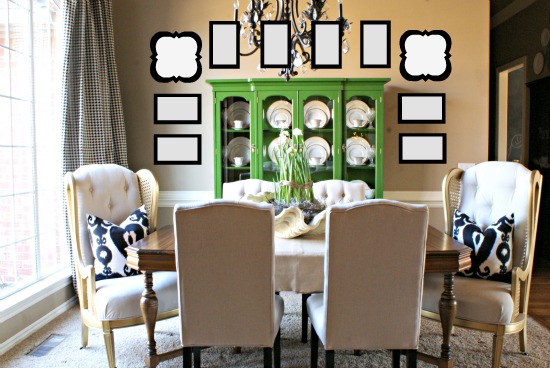
Recently when working on an arrangement for the artwork for my dining room, I played around on the computer before I framed one print or hammered one nail.
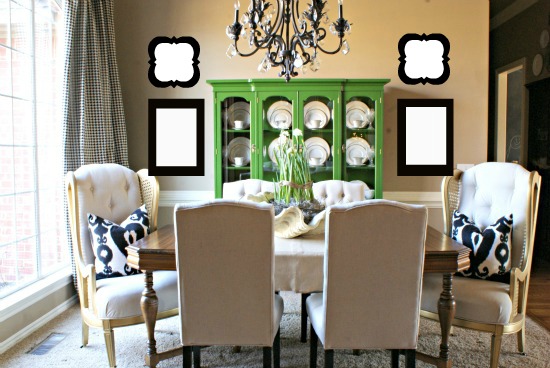
Trying several different arrangements really gave me a feel of the look I wanted. Clearly this would have been going overboard…

I liked this one okay, but it didn’t add any height-everything felt short and squaty.

I finally settled on this arrangement.
Then I used painter’s tape to put the prints on the wall, just to make sure I liked how it was looking in real life.
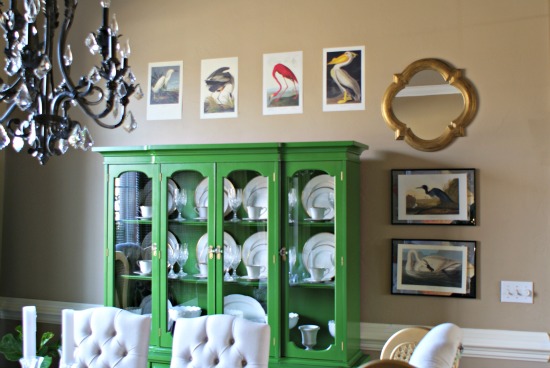
And, the final product:

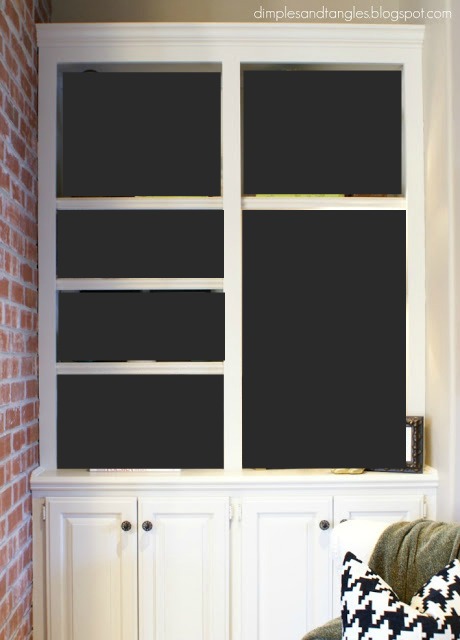
Here are a few other projects that started with a mock-up photo. Yes, these are VERY rough mock-ups, but they confirmed my plans and motivated me to proceed.
I imagined what it would be like to have a big green box in the dining room…

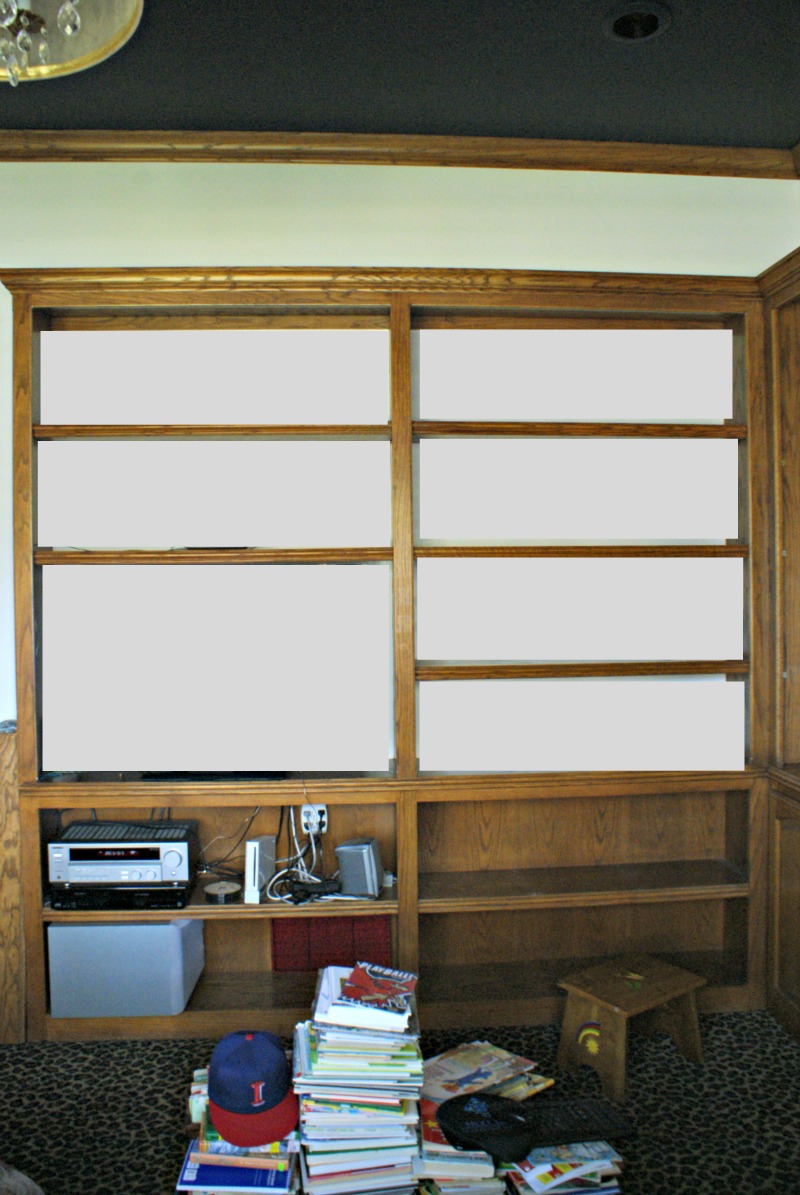
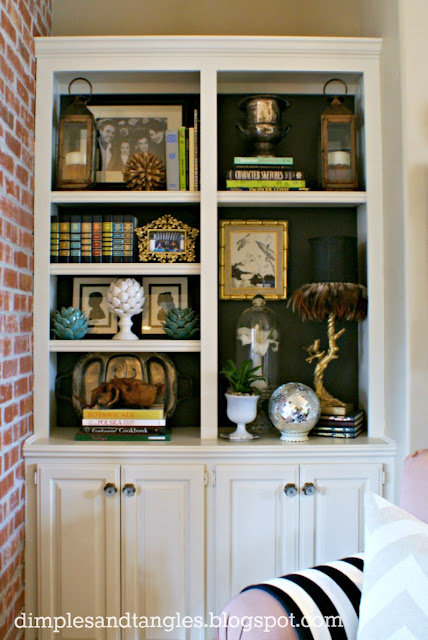
and what the backs of the bookshelves in the living room might look like painted in a dark color…
and what the shelves in the office would look like if I painted the backs to match the walls and left the rest stained wood…


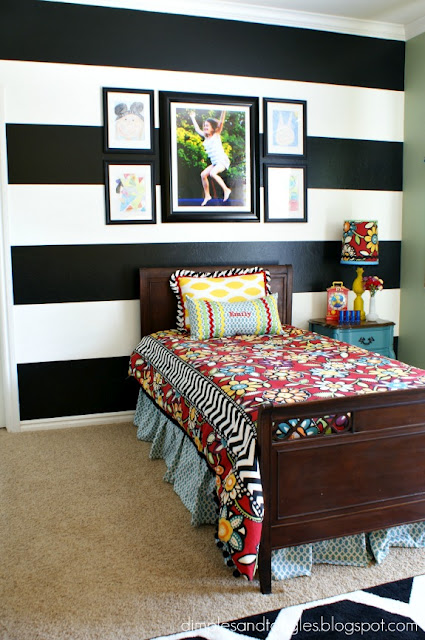
and what my daughter’s wall might look like with stripes.

I don’t have Photoshop which would give more detailed results, so I use my normal editing program, Picmonkey. If you’re not familiar with it, it’s an online, super, easy program. There aren’t specific drawing tools, but I use the “Overlays” tab on the left side and then the “Geometrics” category and choose the shapes I want to get close enough results. Most of the features are free, but there are some that require a membership. I get along just fine without it. Really all you need is a program that will let you play around with shapes and colors.
* * * * * * * * * *
These verses have nothing to do with home design, but they’ve been on my mind today and I hope they will be an encouragement for you.
“I will bless the Lord at all times; His praise shall continually be in my mouth. My soul shall make it’s boast in the Lord; The humble shall hear of it and be glad. Oh, magnify the Lord with me, and let us exalt His name together.” Psalm 34:1-3 (NKJV)